OpenWRT – 1:1 NAT with a Public IP address pool
Some ISP propose to have multiple public IP associated with your internet connection. This could allow you to have dedicated IPs for dedicated systems.
For instance, if you are a company that provides a free Wi-Fi access point, you can link the sub-sequent subnet to a dedicated public IP, which won’t impact your regular public IP (which can host an email server).
In order to be able to achieve such configuration, we will need to make some configuration on OpenWRT.
Disclaimer: All of my screenshot could show a warning that I’ve not set any password. This is intended, as this OpenWRT is for a lab environment and not used in a Production environment. Also, I will use Private IPs in the 192.168.1.0/24 range for the demonstration purpose. Be sure to use YOUR public IPs addresses here!
Creating the interfaces holding the Public IPs
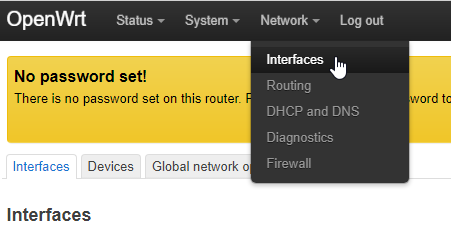
First, we will need to create as many subinterface as we have public IPs available. To do so, head over to Network → Interfaces
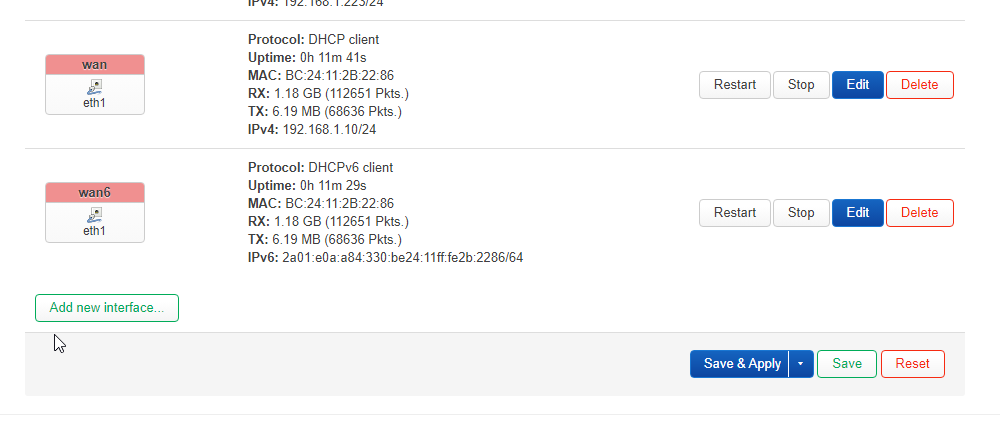
Then, scroll down until you have the « Add new interface button », then click on it.
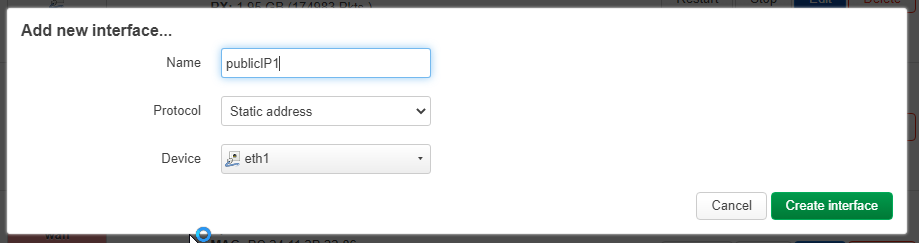
Here, you must give an interface name (pick one that would be clear for its purpose).
Make its protocol as « Static address » and choose the device that is your WAN interface.
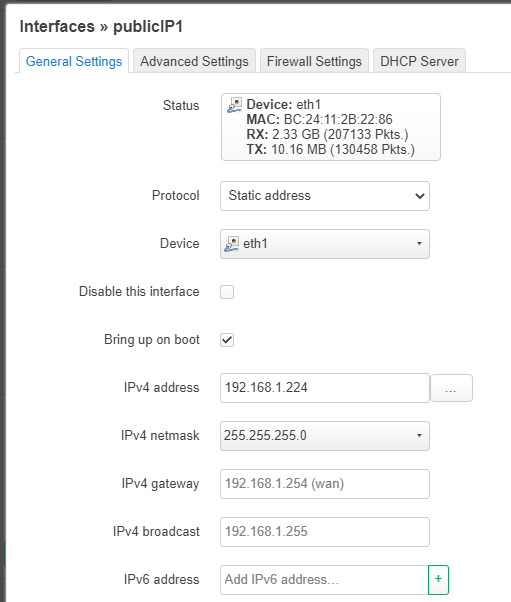
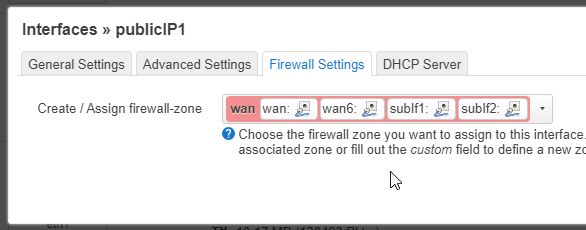
On the next window, enter one of your public IP address (check with your ISP for the settings). And on the Firewall Settings tab, put the interface in the WAN zone.
Don’t forget to click the « Save & Apply » button to commit the changes.
We’re done with the interfaces, let’s create the 1:1 NAT configuration!
Make the 1:1 NAT working
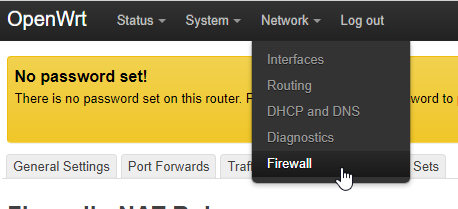
To achieve the 1:1 NAT, head over to Network → Firewall, then into the NAT Rules tab.
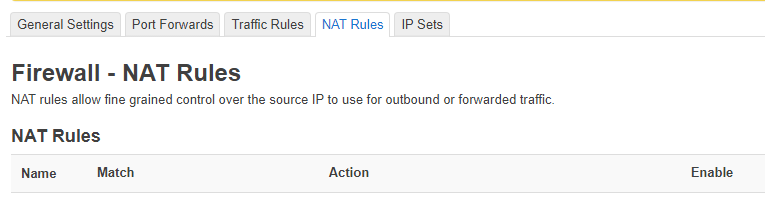
Add a new NAT rule. Give it a clear name (such as Guest access to WAN). We want all protocol to be NAT’ed to this public IP, so leave Any into the Protocol dropdown.
The Outbound zone should be WAN (since it’s for… WAN Access).
Now, let’s configure the magic. The Source address can either be a single computer or a whole IP range (in the CIDR notation). In case you want a single host to be bound to this IP, click on the dropdown, then on the host. For a range, scroll down to the end of the dropdown and in the Custom textbox, enter your IP range (in the CIDR notation). For my example, I’ll map one of my computer to my « public » IP address.
The destination address should be left to Any (since we don’t want to filter out some external host).
The Action should be set to SNAT (since we want to do a Source-based NAT). This will make a Rewrite IP address dropdown to appear. Here, you should select the previously-made interface with the Public IP.
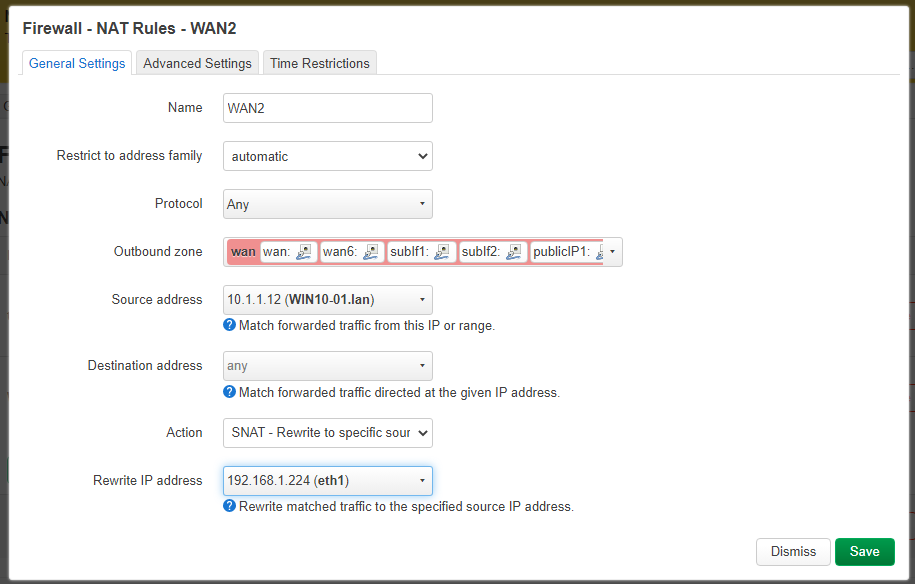
In the Advanced Settings tab, select the Outbound device to be your WAN interface.
And then again, click Save & Apply to commit the configuration.
You could now go on a public IP service checker, such as https://ifconfig.me/ to verify if everything is working 🙂
2 comments